
How to Install a Regular Kitchen Faucet in Your RV
This post contains affiliate links. If you buy through them, we may earn a small commission at no extra cost to you. It helps keep us rolling and writing posts like this one.
If there is one fixture in an RV that feels cheap every single day, it is the kitchen faucet.
Most rigs come with a lightweight plastic faucet with a low spout, no sprayer, and just enough room under it to fill a coffee cup if you hold it at an angle. Filling a pot means wedging it in sideways. Rinsing a big pan is a two handed puzzle.
Here is the good news, and it matches what we covered with light fixtures in our last post. A kitchen faucet is a standard plumbing fixture. Your RV water system does not know or care whether the faucet on the end of the line came from an RV catalog or a home store. If the faucet mounts to your sink and the connections match up, it works.
The mounting is the easy part. The connections are where most people get stuck, and there is a small, cheap fitting that solves it.
Why RV Faucets Feel So Cheap
It is not your imagination. RV faucets are built light on purpose.
Manufacturers count every pound, so plastic wins over metal. The spouts stay low because the cabinet above the sink is close. And the flow stays low because your fresh water tank and grey tank are both limited.
That is all fine for a weekend camper. When you live in the rig full time, you wash dishes in that sink three times a day, and the compromises stop being charming. A real faucet is one of the best quality of life upgrades you can make in an RV kitchen, because you touch it more than almost anything else in the rig.
The One Thing That Stops Most People
Home faucets and RV plumbing speak two different sizes.
Most residential faucets ship with supply lines that end in 3/8 inch connections. RV plumbing is usually 1/2 inch PEX, and the lines under your sink often end in 1/2 inch threaded fittings made to screw straight onto an RV faucet.
So the new faucet almost fits. The lines just will not connect. This is the exact moment most faucet swaps stall, with the old faucet already out and the sink out of commission.
The fix is a reducer adapter, one for the hot line and one for the cold. It takes the 1/2 inch RV side down to the 3/8 inch faucet side. Order the adapters at the same time as the faucet and the whole job stays a single afternoon project.
The Faucet: WEWE Brushed Gold Pull Down
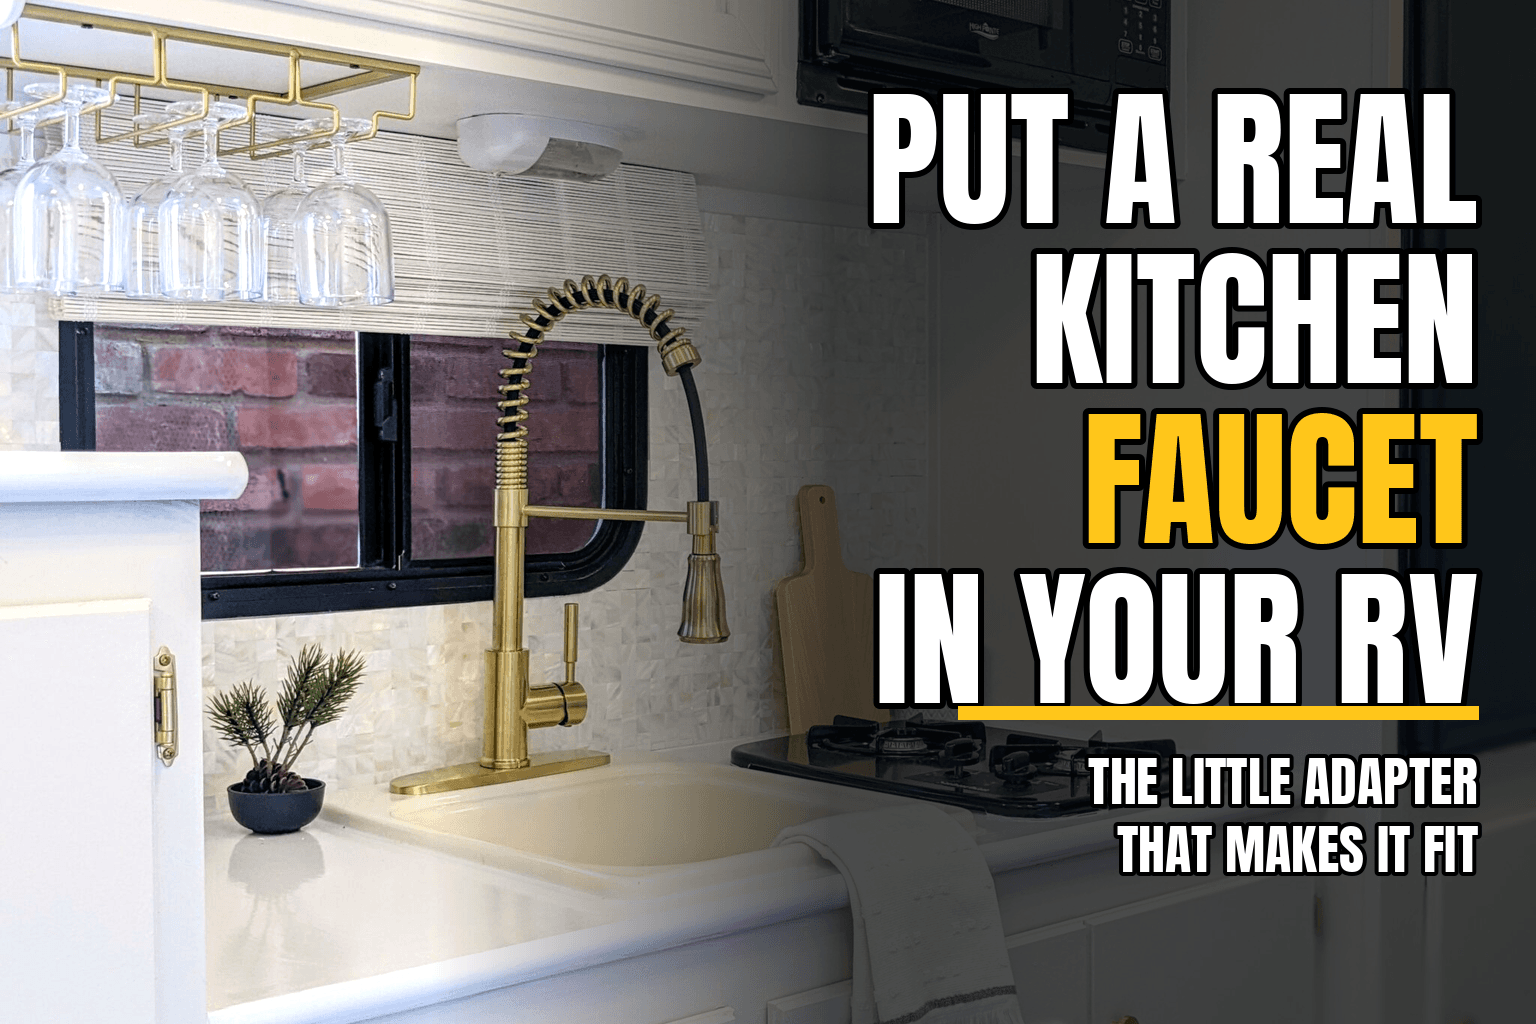
The faucet we would point you to for this swap is the WEWE Brushed Gold Kitchen Faucet with Pull Down Sprayer. It is also the reason the photo at the top of this post looks the way it does. This style of faucet, a tall spring spout with a pull down sprayer, is what a lot of RV remodels end up with, and for good reason.
What it gives you over a stock RV faucet:
- A pull down sprayer with two modes, a soft aerated stream for filling and a stronger spray for rinsing, with rubber nozzles you can wipe clean when hard water starts to clog them
- A full 360 degree swivel, so the sprayer reaches every corner of the sink and the pot sitting next to it
- A 17 inch total height, which sounds tall until you remember it needs to fit under the cabinet over the sink. Measure yours first, but this one was designed compact on purpose
- A 10 inch deck plate in the box, so it installs on a one hole sink or covers a standard three hole pattern
- SUS304 stainless steel construction with lead free materials and food grade PEX inner hoses, instead of the all plastic build most RV faucets have
- A ceramic cartridge, which is the part that decides whether a faucet drips in year three or year thirteen
- Preinstalled supply lines and pull down hose, so most of the under sink work is already done before you start
It weighs about 3.3 pounds, which matters in an RV. Some residential faucets are heavy cast brass monsters meant for thick stone counters. This one is light enough for an RV countertop while still being metal where it counts.
One honest note on flow. This faucet is rated at 1.8 gallons per minute, a normal home rate. On city water at a campground, enjoy it. On your fresh tank while boondocking, that sprayer will empty the tank and fill the grey tank noticeably faster than the stock low flow faucet did. It is a trade worth making for most people, just make it with your eyes open.
The Little Adapter That Makes It Fit
Here is the fitting that makes the whole swap possible: the PerPaiMe 1/2 to 3/8 Reducer Faucet Adapter, 2 pack.
It is a solid brass reducer with a 1/2 inch side that connects to your RV plumbing and a 3/8 inch side that connects to the faucet supply line. The 2 pack covers hot and cold, and rubber washers are included in the box.
A few things to know about it:
- The washer does the sealing. That means hand tight plus a gentle snug with a wrench is the goal. Cranking on it is how threads get damaged and slow leaks get started, and under sink leaks in an RV are bad news because the floor and cabinets are all wood products
- Put the adapters on before the faucet goes in, while you still have room to work and can see what you are doing
- Dry fit everything once before final tightening. RV plumbing has some variety between brands and years, so confirm your lines match the sizes before the old faucet comes out for good
That is the whole secret. One small brass fitting per line, and the residential faucet world opens up to your RV.
Before You Order, Measure These Five Things
Ten minutes with a tape measure saves the return shipping.
- Hole pattern. Is your current faucet one hole, or three holes, and how far apart? The deck plate covers a standard three hole spread, but wide spread designer setups are different
- Hole size. This faucet needs about a 1 3/8 inch mounting hole. Most RV sinks are close, but check
- Height clearance. Measure from the countertop to the bottom of the cabinet or window frame above the sink. You need room for the 17 inch faucet plus your hand working the sprayer
- Room under the sink. A pull down faucet has a hose that hangs in a loop under the sink with a weight on it. That loop needs clear space to move. If your under sink is packed tight or the water lines and drain leave no room, a pull down will frustrate you
- Counter thickness. RV counters are thin. That is usually fine for this faucet's hardware, but confirm the mounting nut can grab properly on your deck
Also check whether your rig has shutoff valves under the kitchen sink. Plenty of RVs do not. If yours does not, your shutoff plan is the water pump switch and disconnecting city water, which is fine, it just belongs in the plan.
The Swap, Step by Step
We are not going to pretend every rig is identical under the sink, but the order of operations is the same almost everywhere.
- Turn off the water pump and disconnect city water. Open the faucet to let the pressure bleed off
- Take a photo of the existing connections before touching anything. Future you says thanks
- Put a towel and a small container under the fittings, then disconnect the hot and cold lines. There is always some water left in them
- Remove the old faucet's mounting nuts from underneath and lift it out. Clean the deck surface well so the new base seals flat
- Set the new faucet, with the deck plate if your sink needs it, and start the mounting hardware loosely
- Thread the adapters onto the RV lines, then connect the faucet supply lines to the adapters. Hand tight, then a gentle snug. Do not force anything
- Check that the pull down hose loop hangs free and the weight is on the hose where the instructions show it
- Straighten the faucet, finish tightening the mount, then turn the water back on slowly. Check every joint you touched with a dry finger or paper towel. Dry means sealed. Any dampness means snug that joint a little more
- Run both spray modes, swivel the faucet through its full swing, and check under the sink one more time
The manufacturer says a home install can take under 15 minutes because the lines come preinstalled. In an RV, budget a relaxed hour. The fittings are the same, the working position under an RV sink is just smaller, darker, and somehow always behind a water line.
RV Specific Watch Outs
Vibration is real. A house does not drive down the highway. After your first travel day with the new faucet, open the cabinet and check every fitting again. Do it once more after the first week. Fittings that survive that are usually settled for good.
Secure the hose weight. If the counterweight on the pull down hose can swing and bang while you drive, wrap it or reposition it so it rides quietly and does not chafe the hose or the water lines.
Winterizing includes the sprayer. The pull down hose holds water. When you winterize, run the faucet including the sprayer mode as part of your antifreeze or blow out routine, and leave the sprayer head pointed down in the sink so the hose drains.
Watch the first week for drips. RV floors and cabinet bases do not forgive slow leaks. A dry paper towel under the fittings for the first few days is a cheap leak alarm. If it stays dry, you are done.
When a Home Faucet Is Not the Right Call
Honesty section, because not every rig should do this.
- If your under sink has no room for a hose loop, choose a standard high arc faucet without a pull down instead. The adapter trick still applies
- If your sink holes do not match any plate or pattern the faucet supports, the project turns into sink replacement territory. That is a different Saturday
- Faucets with touch sensors and electronics add batteries or power wiring to a wet cabinet in a moving vehicle. We would skip those in an RV even though they are neat in a house
- If you mostly boondock on a small fresh tank, think hard about that 1.8 gallon per minute rating. A lower flow home faucet with the same adapter may fit your life better
Our Honest Take
The RV industry charges RV prices for faucets that feel like toys, mostly because the fittings are RV specific. One small adapter per line removes that lock in. After that, you can buy a metal, pull down, swiveling kitchen faucet built for a house, at house prices, with house selection.
If gold is not your thing, this faucet comes in other finishes, and the same adapter works with just about any residential faucet that uses 3/8 inch supply connections. The faucet is the fun part. The adapter is the part that makes it an afternoon instead of a headache.
The two things you need:
- Faucet: WEWE Brushed Gold Kitchen Faucet with Pull Down Sprayer
- Adapter: PerPaiMe 1/2 to 3/8 Reducer Faucet Adapter, 2 pack
Measure first, order both at the same time, and check your fittings after the first drive.
Next up in this little series of making an RV feel like a home: the bathroom faucet gets the same treatment.
Trevor and Savannah HoppingStates